ready to give your space a fresh face? here’s how to hang wallpaper like a pro.
Whether it’s a feature wall, a little alcove, or a wall-to-wall room transformation – wallpapering can feel like a daunting task, especially if you’re new to it. But there’s no need to procrastinate or fork out hundreds on a professional. With the right advice, doing it yourself is a lot easier than you might think!
Our guide will take you through everything you need to know about hanging wallpaper, step-by-step. We’ll also answer some commonly asked questions, like how to wallpaper around a window, corners, sockets and more.
Not ready to hang your wallpaper just yet? Check out our wallpaper buying guide.
Before you start thinking about how to hang wallpaper, you’ll need to gather some supplies. While you might manage to hang wallpaper without every single one, having all of these tools at your disposal will make the process much easier, and the end product a lot more polished.
supplies.
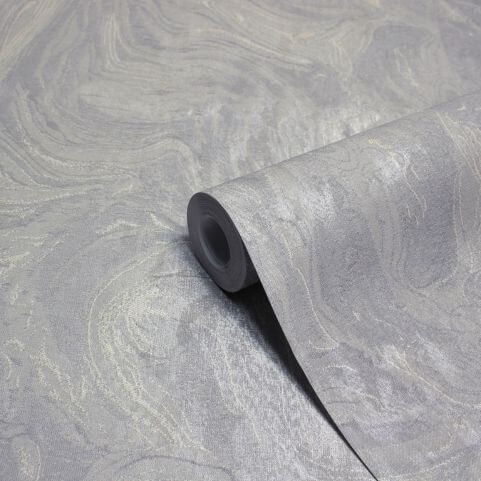
- ‘Paste the wall’ wallpaper rolls.
- Wallpaper paste/adhesive.
- Roller or pasting brush.
- Wallpaper smoother, brush, or clean cloth.
- Wallpaper seam roller (for smoothing the joins between sections).
- Scissors, knife, or another sharp tool.
- Ruler and measuring tape.
- Plumb line, spirit level or laser level.
- Stepladder.
- Dust sheets.
for preparing your wall.
- Stripping knife or wallpaper steamer.
- Wall filler.
- Sandpaper.
staying safe.
- Make sure the room is well ventilated while you work and while the wallpaper dries.
- Wear a dust mask if your walls need to be heavily sanded.
- Get someone to help if you’re wallpapering ceilings, stairwells, or other high areas.
- Wear protective gloves and goggles when handling wall filler, adhesives and chemicals.
- Don’t forget to keep adhesives, sharp tools and chemicals out of the reach of children.
1. prepare your room.
Preparation is a key step in any decorating endeavour. If you want to feel proud of the finished product, start by making sure your walls are as clean, smooth, and flawless as possible.
- Remove any existing wallpaper – use a wallpaper steamer or a cloth soaked in hot water to loosen stubborn residue.
- Remove any nails, screws, brackets, etc. and use wall filler to re-pack the holes.
- Ideally, remove radiators and any light fittings too, but you can work around these.
- Fill in any other cracks or holes, and sand them down to a smooth finish once dry.
- Switch off the electricity mains and remove any socket or switch covers.
- Sand down any rough areas until smooth.
- Use a sponge to clean the walls with warm water and mild soap. Allow them to fully dry for a minimum of 24 hours before wallpapering.
- Use dust sheets to cover the floor, doors, and any remaining furniture.
2. prepare the walls.
Different wall surfaces require different approaches to wallpapering. Whether you’ve got painted walls, porous walls or plasterboards – each needs unique preparation in order to look its best at the end of the wallpapering process.
emulsion.
Freshly painted walls should generally be left for 4 weeks before applying wallpaper (refer to the paint manufacturer's instructions for specific guidance). If it’s a silk or gloss paint, sand your walls down and apply a primer. If it’s a matt paint, clean the walls as above and leave to dry for 24 hours.
porous surface – e.g. plaster or cement render.
Ensure any old plaster is stable, clean, and free of mould. If you’re working with new plaster, make sure it’s completely dry before wallpapering. Cement render and concrete should be sanded down until completely smooth. Seal the wall with a primer or diluted paste. Allow the primer to completely dry as this will stop the paste being absorbed during installation.
plasterboard.
Use wall filler to pack any screw holes or joints between the plasterboards. Smooth and seal the wall with a primer the day before. Make sure your wall has dried completely before wallpapering, as this will ensure no paste is absorbed into your wall during the application process.
3. measure your wall + cut the wallpaper.
Start by measuring your first wall from bottom to top with a measuring tape. Choose a clear stretch without any switches or sockets, adding 20 centimetres to your measurement for wastage and trimming. Repeat this process for each wall you’ll be wallpapering, and cut your paper to size.
4. choose a starting point.
Your ideal starting point depends on the design of your wallpaper. The general rule is that larger patterns should start from the middle of the wall, while smaller or less-detailed designs can begin from a corner. If your room has a focal point like a fireplace or chimney breast, you should begin at its centrepoint.
5. use a levelling tool to create a vertical line.
Once you’ve found your starting point, you’ll need to make sure that your wallpaper hangs perfectly vertically. The ceilings and walls in most homes tend to be slightly wonky, so it’s unfortunately not as easy as just lining up your wallpaper with a corner or doorframe.
Instead, use a levelling tool like a plumb line, spirit level or laser level. A plumb level is just a weight attached to a long string, which you can hang from your wall to create a vertical drop. Push the bottom of the string against your wall, and trace it with a soft pencil to mark the line. This will be the guideline for your first strip of wallpaper, which you’ll need to create afresh for every new wall.
6. paste your wall.
All our wallpaper is ‘paste-the-wall’, meaning you don’t need to apply any paste to your wallpaper. Instead, use a brush or roller to apply the wallpaper paste directly to the surface of your wall. Start at the top and work your way down – pasting parallel to your guideline in thin, even layers.
Make sure you’re pasting the full width of your wallpaper strip, adding 2cm to ensure that the seams are pasted down and you’ve got plenty of room when hanging your next strip.
7. hang your paper.
Position your first strip of wallpaper parallel with your straight guideline. Starting at the top (and making sure to leave at least 5cm excess), begin pressing the wallpaper into place. Work your way down the wall, gently smoothing out any air bubbles as you go.
The beauty of paste-the-wall wallpaper is that it gives you time to position and manoeuvre your strips. Line up the pattern as best as you can, and if you’re not happy, just strip it off and start again. Carefully trim the excess paper from the top and bottom of your wall, and smooth the paper back against the wall.
8. repeat across your wall.
Using this same method, apply the remaining wallpaper strips to your wall. Your first strip should be hung perfectly straight, which means you can use it as a guide for the next strip, and so on.
Make sure all the seams are smooth and the patterns are lined up. Remember to take it slow, and don’t be afraid to re-apply a strip if you’re not happy with it.
And that’s it! We’ve covered everything you need to know to get wallpapering like a pro. You should now know how to wallpaper any regular wall with ease, but what about those niggling nooks and crannies? Read on for top tips on tackling your most commonly asked wallpapering questions – from wallpapering ceilings to wallpapering behind radiators, around sockets, corners and more.
Now that you know every step involved in giving your walls a stunning transformation, let’s go through some of the most commonly asked wallpapering questions.

how to wallpaper a ceiling.
A trend that’s become increasingly popular in recent years, wallpapering the ceiling is not a simple task. It follows the same process as walls for prepping, measuring, cutting, pasting, hanging and trimming, but is made difficult by the simple fact that you’re working overhead.
To make wallpapering your ceiling as easy as possible, get someone to help you! They can help support the wallpaper as you hang it. A platform like a board between two ladders will give you a base to work from, and using a laser level will prevent you from having to draw lines. Start at a window and work away from it, applying your wallpaper lengthways across the ceiling.
how to wallpaper around a window.
Wallpapering around a window is easy once you know how! Once you’ve made your way over to the window, hang a strip down over it. Feel for the corners of the window frame and lightly mark them with a pencil on your paper.
Cut the paper horizontally straight across to the pencil mark, so you have a flap that you can smooth on to the vertical side of the window recess. Trim to make it neat.
For the top underside of the window recess, you can either wallpaper with a new strip from the top of the wall (remembering to pattern match) or add another piece underneath the existing wallpaper.
For under the window, follow the usual process, taking care to pattern match.
For windows with trim, simply cut the wallpaper at a 45-degree angle from the edge of the wallpaper toward the corner of the trim. You can then smooth out the wallpaper and trim using a ruler and knife.
how to wallpaper around corners.
When it comes to wallpapering corners, you’ll need to leave an overlap of 2.5cm to avoid gaps. First, measure the distance between the last strip you hung and the corner. Add 2.5cm to this measurement, and cut a strip of wallpaper to this width. This will give you your overlap.
Hang this piece as you would normally, smoothing it into the corner and onto the adjacent wall. Trim the paper at the top and bottom as usual.
Then, set a straight line for the adjacent wall with your plumb line, and use it as a guide to hang your next strip. Push it into the corner, overlapping the 2.5cm that you smoothed over on this wall. Pattern match as much as you can for a neat finish.
You could take this a step further, and slice through both layers of wallpaper after the overlap. Remove the surplus from each layer and smooth down – you should be left with a perfect seam.
how to wallpaper a feature wall.
A feature wall is a uniquely decorated wall within a room. As feature walls are meant to stand out and make a statement, it’s important to pay special attention to pattern when hanging them.
If it’s a small pattern, feel free to start from a corner. Use your levelling tool to draw a vertical line roughly 50cm from the corner, and start wallpapering from there.
If your wallpaper has a larger pattern, start from the middle of the wall. The hanging process is mostly the same, but you need to make sure that the pattern is centralised.
We recommend painting the edges of the wall first in a colour that matches your wallpaper or the rest of the room. This way, the corners are camouflaged if you don’t manage to wallpaper them exactly.
how to wallpaper around sockets + light switches.
Once again, wallpapering around sockets and switches isn’t too tough once you know how. Start by double-checking that you’ve turned off the electricity and removed the switch and socket covers.
Hang your wallpaper as if the switch or socket wasn’t there, covering it completely. As they protrude from the wall, you should be able to easily feel switches and sockets through the paper. Use your knife or scissors to cut a small ‘X’ shape in the paper, with its centre lining up with the centre of the switch or socket. From here, you can extend the crosscut to near the edges of the socket. Don’t go too far, as you might end up with bare gaps that your switch/socket cover won’t conceal when you reattach it.
Fold back the flaps created by your crosscut. Remove any paste residue from your socket with a cloth, and carefully trim the excess paper from the folds. Leave to dry for at least 30 minutes before reattaching the cover and turning on the electricity.
how to wallpaper stairs.
A modern interior trend that creates a uniquely bold look – wallpapering your stairs is never a bad idea. It’s not too tricky to master, and is a perfect way to use up any paper you might have left over from bigger projects.
Follow the exact same steps to prepare your stairs as you would to prepare your walls, making sure they’re free of debris, clean and smooth.
Next, measure the width and height of your stair rises (the vertical bit that you don’t stand on). These should be identical, but measure a few random sections just to be sure.
Once you’ve got your dimensions, create a template out of cardboard will make the cutting process a lot easier. Cut a section of cardboard that’s a few centimetres larger than your stair rise in both width and height (you can trim off the excess once the wallpaper is applied). Unroll a section of wallpaper, place the cardboard on top, and cut around it with a sharp knife to create your first wallpaper strip.
Repeat this step until you’ve got a strip of wallpaper for every stair rise, and follow the same application method as explained above. When wallpapering small surfaces like stair rises, it’s better to go for smaller patterns, as you want as much of the design on show as possible.
how to wallpaper behind a radiator.
Ideally you would remove any radiators before wallpapering, but that can be a tricky job in itself. If you can’t remove your radiator, then make sure it’s switched off and fully cooled down. Heat can prevent the wallpaper paste or adhesive from drying evenly. Grab a feather duster and clean behind the radiator as thoroughly as you can.
Have a look at where the bracket connecting your radiator to the wall sits in relation to the ridges on the front of your radiator. Count the ridges from the edge nearest the bracket, and make a note of this number.
Then, apply the wallpaper paste as evenly as possible behind the radiator. You’ll need a slim, long-handled roller or brush to fully cover the area. Hang the wallpaper as normal and let it cover your radiator.
Remember the ridges you counted to where the bracket sits? Count along to this number again, and lightly mark it with pencil on your wallpaper. Cut along this pencil line from the bottom of the wallpaper up to the top of where the bracket starts.
Lift your wallpaper up above the radiator and, using a clean long-handled roller, start to push each section down behind it. Once it’s as far down as it can go, reach up from the bottom of the radiator and pull it down. Smooth out as much as you can, and connect the seams underneath the radiator.
how to hang patterned wallpaper.
Intricately patterned wallpaper can feel like a bigger job, purely because you need to match the pattern on each strip with the previous one. The key here is to not cut your wallpaper strips in advance. It might feel like you’re saving time, but it usually results in patterns not matching up, and all your wallpaper will go to waste.
Take it slow and steady, only cutting a new strip after you’ve applied another to the wall. This will give you a handy reference point, allowing you to match up your pattern with a previous strip. Make sure that you still leave plenty of excess wallpaper at the top and bottom to create that neatly trimmed edge.
how to hang wallpaper without seams showing
The best way to prevent seams showing when wallpapering is to take it slow and be meticulous in your application. You also need to make sure that your wall is as smooth and primed as possible before starting, and that you’re using a moderate amount of paste on your wall.
To fix lifting seams after you’ve finished, use a small amount of adhesive and a small brush to carefully stick the wallpaper back down.
And that’s a wrap. You’ll now known everything there is to know about how to wallpaper – from each step of the application process to tackling those trickier areas.
Ready to get started? Head over to our extensive collection of signature-designed wallpaper, and order unlimited samples of our stunning designs for just £1 each. If you need some advice on ordering, check out our comprehensive wallpaper buying guide.
shop our paste-the-wall wallpaper.